

how to fix an oil leak
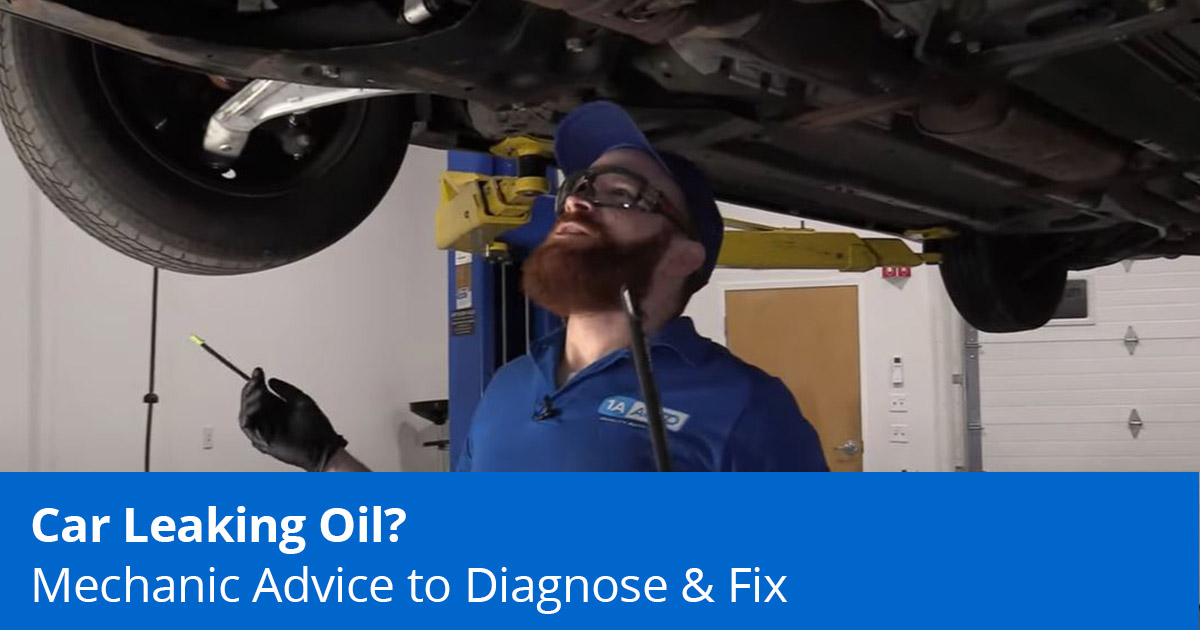
How to Diagnose and Fix Oil Leaks
The most common sign of a car that's leaking oil is a visible oily puddle that collects underneath the vehicle every time it's parked. While this may be easy to ignore, it can lead to expensive repairs if left unchecked. The good news is that you don't have to be a trained mechanic to find out what's wrong.
Why is Oil Important for an Engine?
Oil ensures that your engine stays lubricated. When it leaks, moving parts can experience increased friction and may eventually overheat. They could also be forced to work harder than normal, causing them to fail. While this may lead to serious damages in the long run, it's not a cause for concern if detected early.
Not Sure What to do with an Oil Leak?
In this post and the video below we'll teach you how to diagnose oil leaks. We will also include a list of the symptoms that you should look out for, the most common causes of an engine oil leak, and how to fix the problem.
How to Tell if Your Car is Leaking Oil
1. Oily puddle under your car
As mentioned earlier, if you find a brown or dark oily liquid under your car, chances are, you're engine is leaking oil. If the puddle is pink or red, it could be your transmission fluid. A green or orange color is a sign that it's your coolant. Be sure to take a closer look to see what color of fluid is underneath the car.
2. Blue smoke coming from the tailpipe
If you see blue smoke coming from the exhaust, it's a sign that you have an engine oil leak. Oil is not supposed to find its way into the combustion process of the engine. But, when it does, it gets burnt up together with the fuel leading to the formation of blue smoke. This may be accompanied by the smell of burning oil.
3. Oil warning light
The oil warning light comes on when there's a decrease in oil pressure. This normally happens when you're running low on oil. If your car isn't burning oil, then your car must be leaking it. The best thing to do here is to first pull over and check your oil level.
4. Overheating engine
When the level of oil drops too low, it leaves moving parts unlubricated – causing them to grind over each other. The increased friction can cause the engine to get too hot and overheat. This may be accompanied by a temperature gauge that shoots into the 'red zone.' If your engine is overheating from low oil, the damage is done, and topping-off or changing the oil likely will not help.
Possible causes of a car leaking oil
One of the most common causes of an oil leak is a gasket that is damaged, worn, or torn. This is normally caused by prolonged use or exposure to external elements like road debris. A damaged gasket causes oil to leak to other parts of the car and find its way to the ground.
As such, the first step in learning how to diagnose oil leaks is to inspect areas that you'd normally find a gasket.
1. Valve cover leak
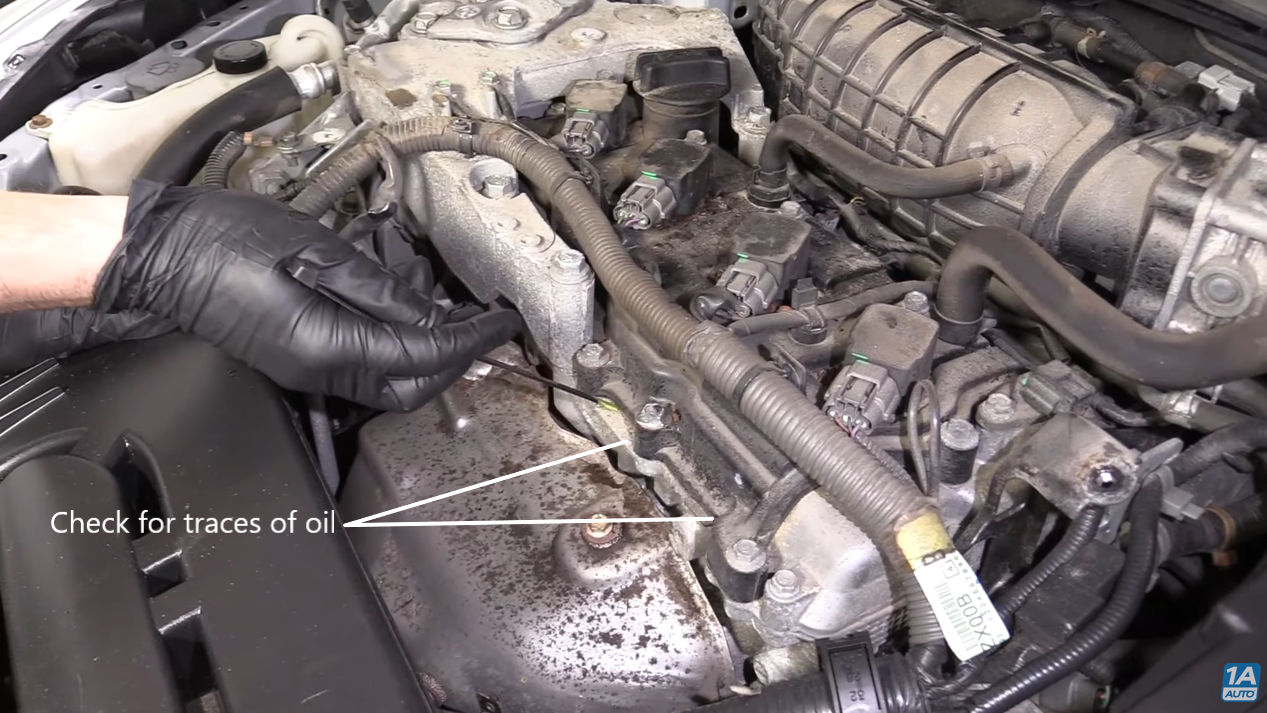
A valve cover that has traces of oil may indicate that you have a valve cover gasket leak. You'll need to first check the surrounding area where the valve cover is bolted to the engine block.
This includes taking a look at the backside as well. If you see any traces of oil, it may be escaping through a gasket that is cracked, rotten, or one that has lost its seal.
To confirm that you indeed have an oil gasket leak, wash down the engine and then check for leaking oil.
2. Oil pan gasket leak
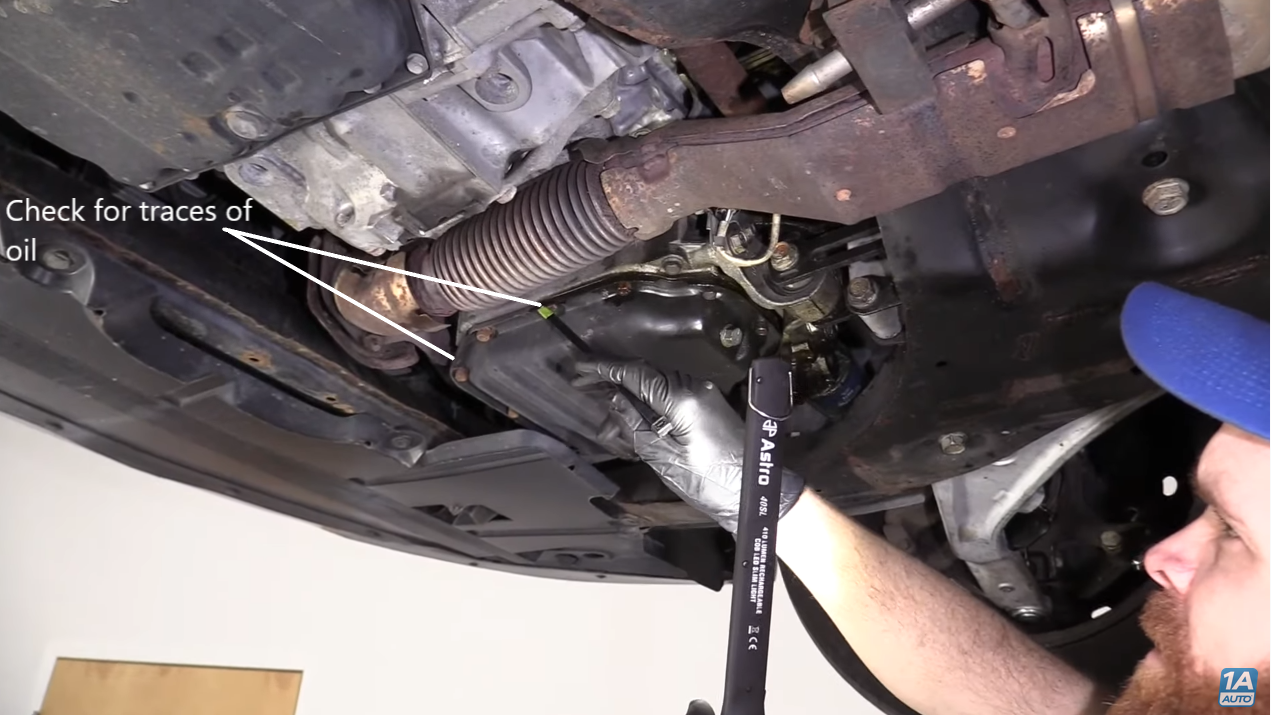
Like the gasket found on the valve cover, the one installed on the oil pan can wear out and fail to seal the oil. This results in another oil gasket leak that occurs as the fluid circulates between the oil pan and engine block.
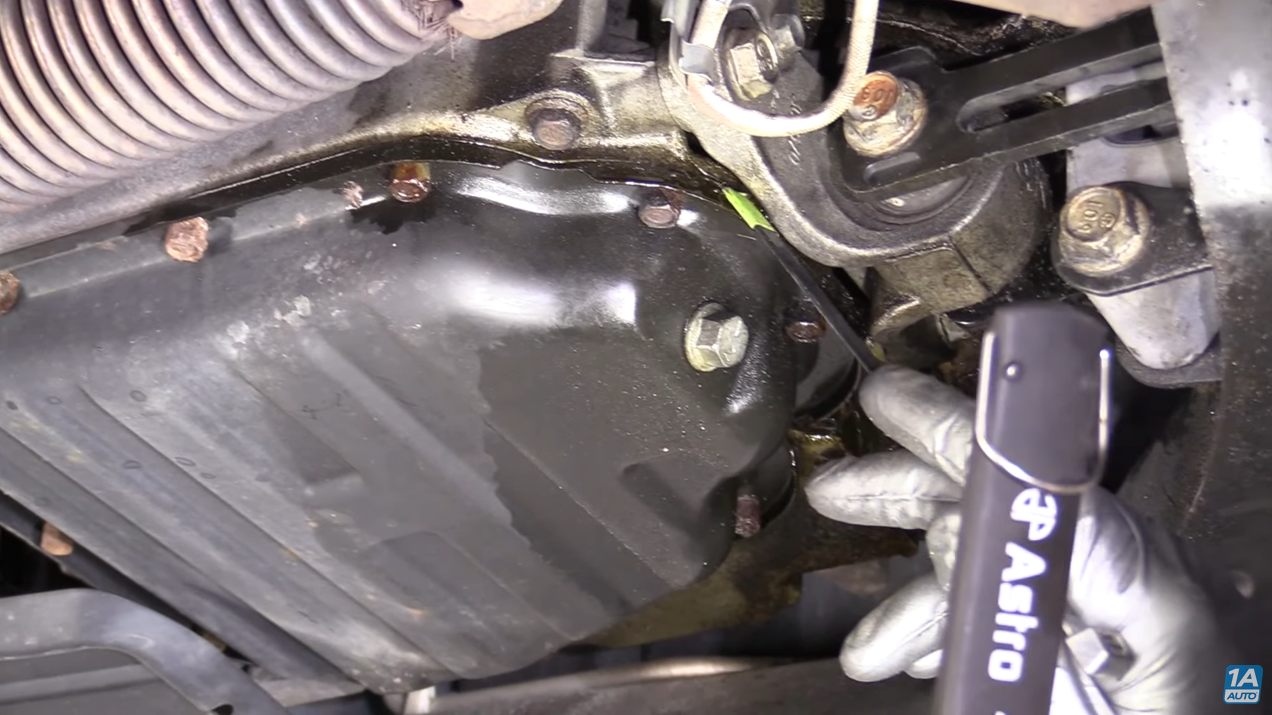
If you're wondering how to diagnose oil leaks here, start by checking around the oil pan. You can first wipe off the area to confirm whether the drops of oil are coming from the pan or higher up the vehicle.
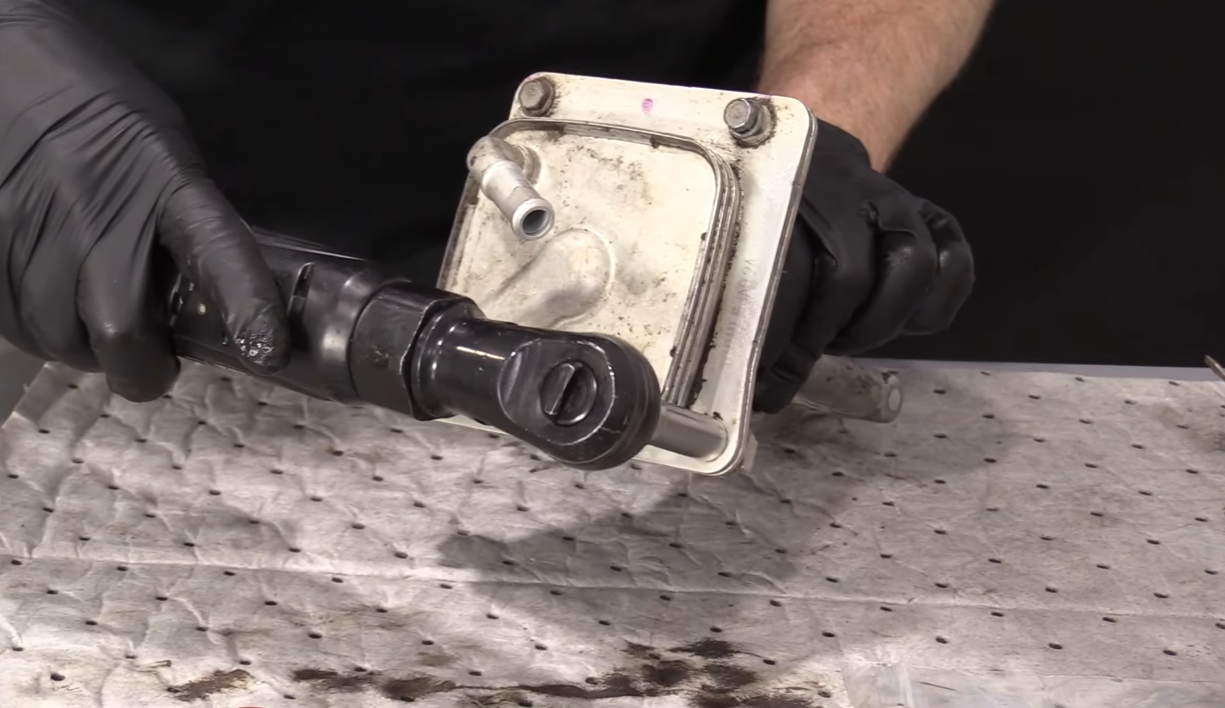
3. Oil cooler gasket leak

Your car's engine oil cooler helps to remove excess heat from the engine oil. It also comes with a gasket that prevents the oil from leaking out of the cooling system. If the gasket is degraded, it will not be able to seal the oil effectively.

A leaking oil cooler will be characterized by oil dripping from the sides and down to the engine. Be sure to check around it for traces of a brown or dark oily fluid.
How to replace a leaking oil cooler gasket
After diagnosing your oil leaks, you'll want to fix the problem starting from the highest point of leakage.
The steps given below are based on a 2012 Nissan Altima that had an oil cooler gasket leak. You can also watch the process of fixing the problem on our video Oily Puddle Under Your Car, Truck or SUV? How to Diagnose Oil Leaks.
Tools you'll need:
1. New oil cooler gaskets
2. Motor oil
3. Breaker bar and socket
4. Flathead screwdriver
Steps to replacing an oil cooler gasket
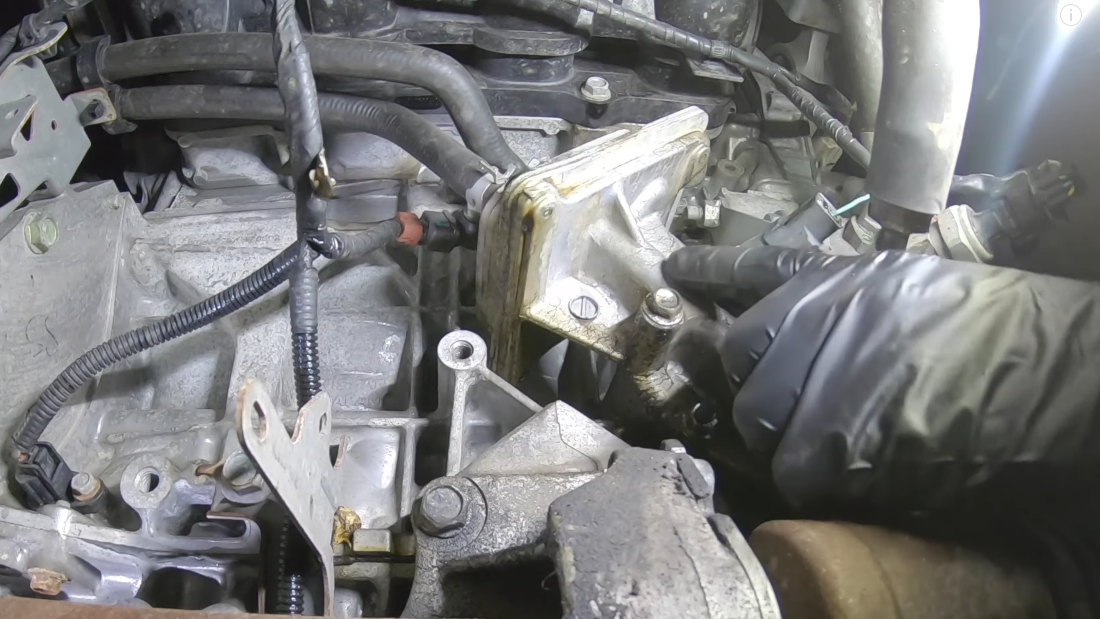
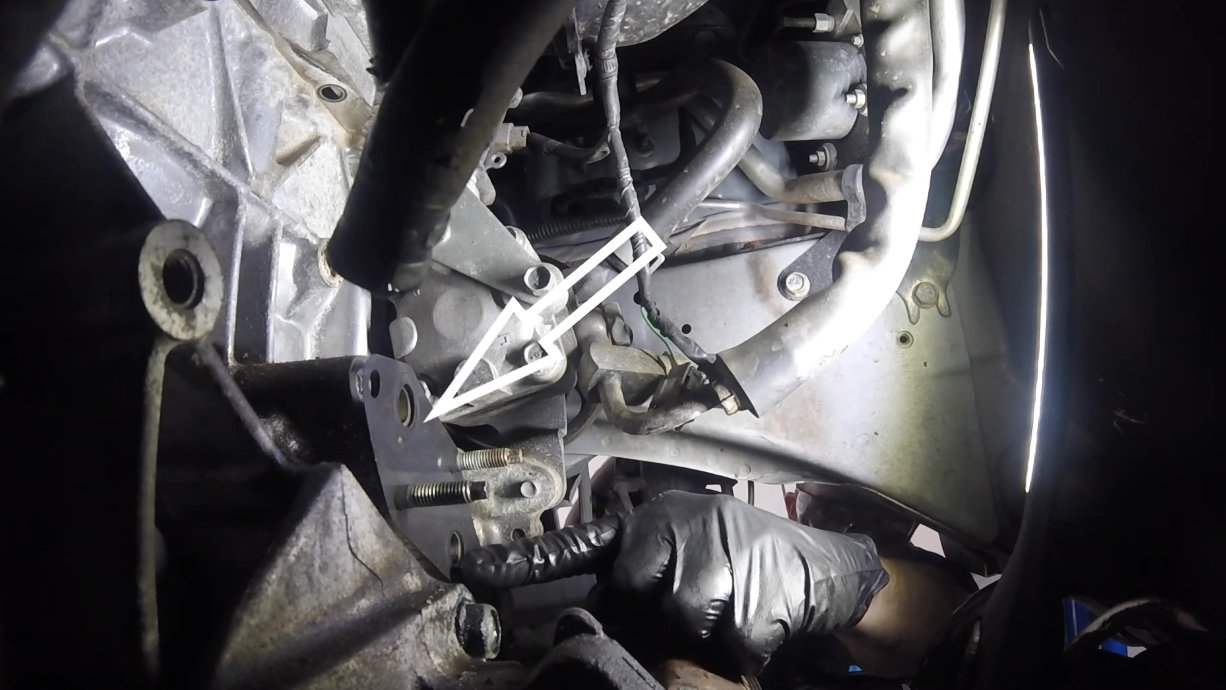
Step 1. Locate the oil cooler from underneath the vehicle.
Step 2. Clean it along with the surrounding area.

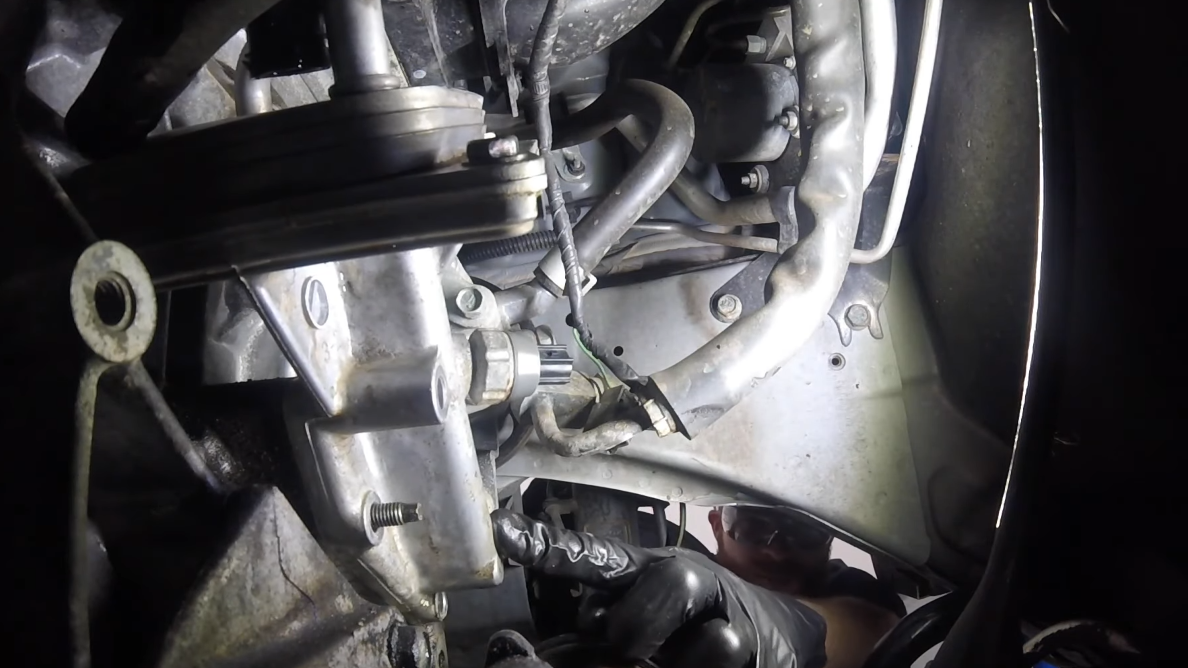
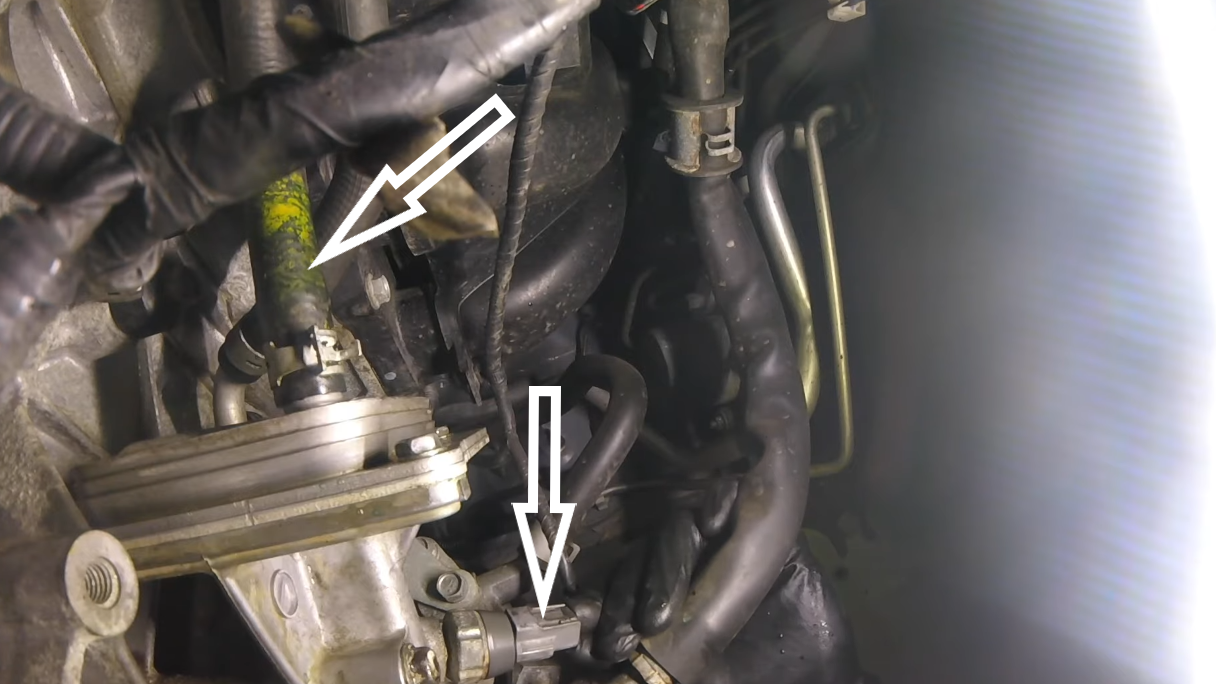
Step 3. Start by removing the connector that's directly connected to the oil cooler.

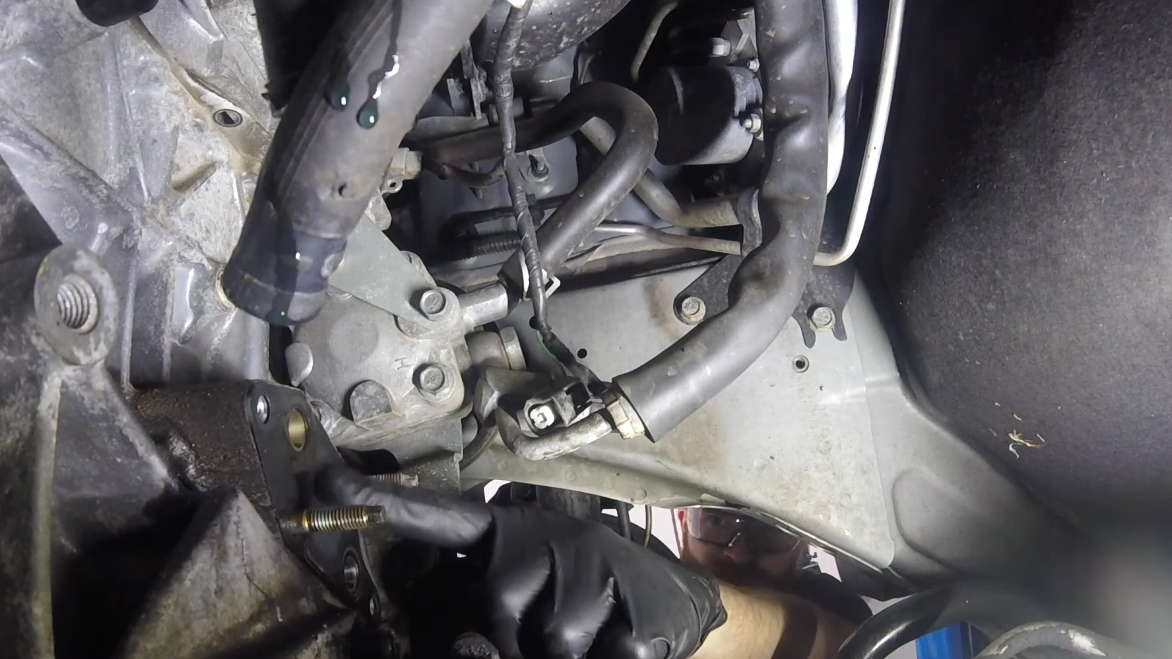
Step 4. Disconnect the hoses located at the top by taking off the clamps that secure them. You can use a marker to mark the hoses by their point of connection.
This makes it easier to remember where each hose goes when reinstalling the oil cooler. Have a bucket underneath to catch any fluids that may come out of the hoses.

Step 5. Use your breaker bar and socket to remove the bolts and nuts that secure the oil cooler.

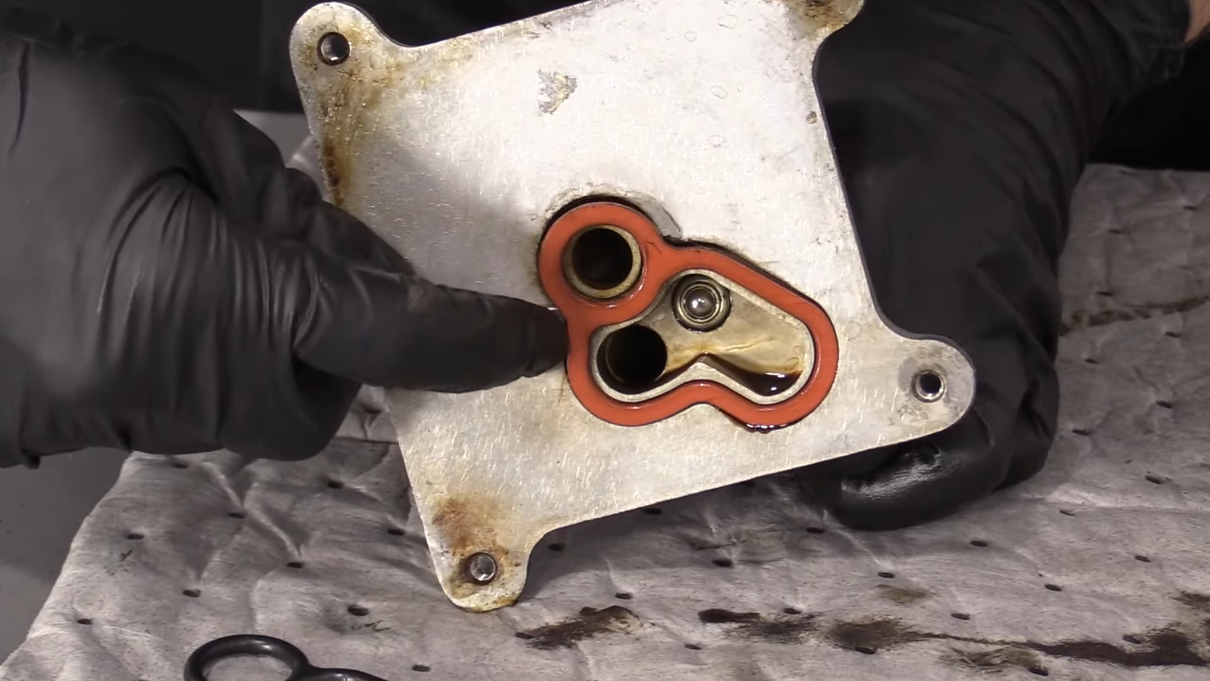
Step 6. Once the oil cooler is out, remove the gasket that is found between the cooler and the engine block.

Step 7. Remove the four bolts that tighten the cooler to access the gasket.

Step 8. Clean the inside of the unit.

You can scrub the area with a razor, wipe it off with a cloth, and spray parts cleaner inside the holes.
Step 9. Pry off the oil cooler gasket using a flathead screwdriver.
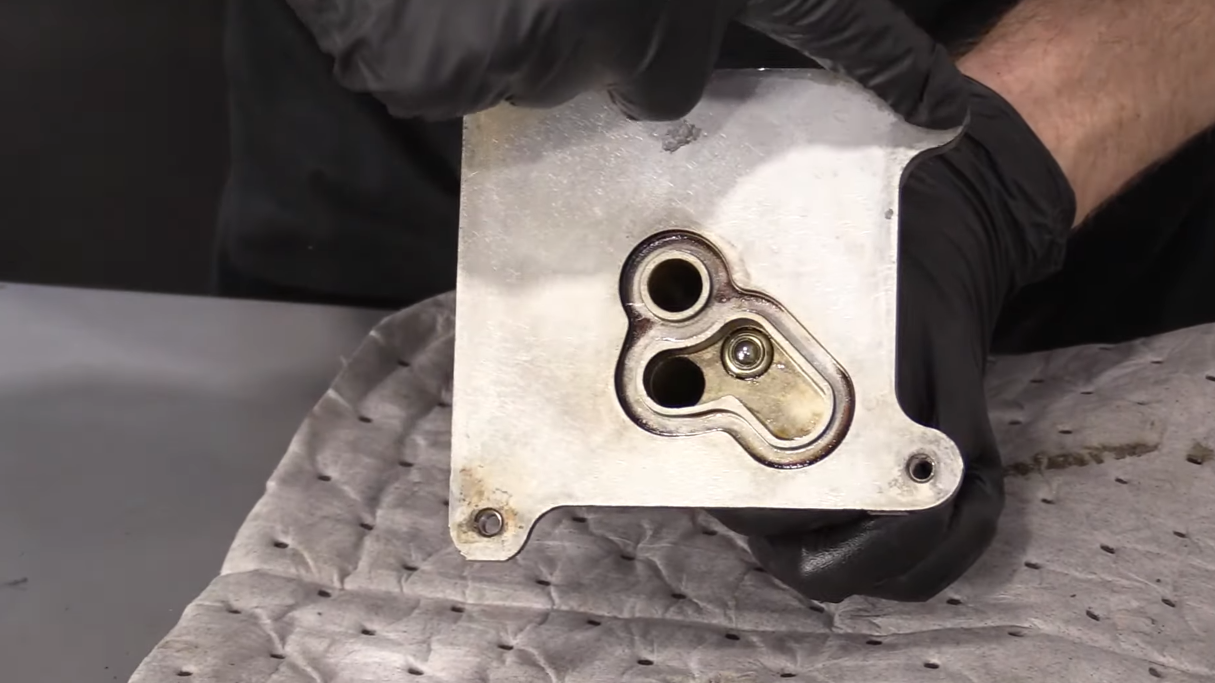

Step 10. Clean the area where the gasket was attached to as well as the other parts of the oil cooler.

Step 11. Lubricate the new gasket and install it. Make sure it's a perfect fit.
Step 12. Screw the unit back in place.

Step 13. Before you reinstall the cooler back into the car, clean the area where it's supposed to mount.
Step 14. Install a new gasket on the clean surface. Make sure it fits perfectly and isn't installed backward.
Step 15. Grab your oil cooler and reinstall it. Confirm that you have screwed all the bolts in place and torqued them to the manufacturer's specification.
Step 16. Reconnect and clamp the hoses and the connector to the cooler.

Step 17. Check the level of your oil and coolant. If you need to top up, do so.
Step 18. Take your car for a test drive. Check underneath for any oil leaks once you're back.
Shop Parts Featured in this Post:
- Engine Oil Cooler
- Gasket
- Valve Cover
- Breaker Bar & Sockets
Related Content:
- Excessive Oil Consumption: Why It Happens, How to Prevent It, and How to Fix It
- How to Change Oil on Any Vehicle by Yourself
- How Often Should You Change Your Oil?
- Beginner Car Care: Checking Your Car Or Trucks Engine Oil
- Recycling Waste Fluids and Oils? How to Dispose of Motor Oil, Antifreeze, Brake Fluid, and More
how to fix an oil leak
Source: https://blog.1aauto.com/car-leaking-oil/
Posted by: rackerswaver1990.blogspot.com
0 Response to "how to fix an oil leak"
Post a Comment